How to setup Multiplayer
Multi-instance allows users to run multiple emulators at the same time, which will optimize the gaming experience sharply. Here is a general introduction of Multi-instance, all functions included as follows:
Multi-instance manager
1.Batch operation
2.Multi-instance Settings
3.Multi-instance Arrange
Here is a tutorial about 3 below function: Click here
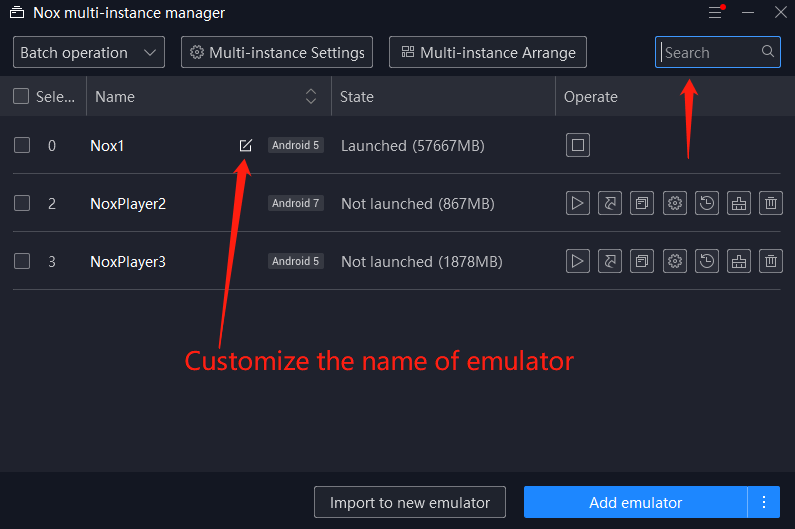
4. Search and name the emulator
This function is generally for the users who have many instances, search for the instance you want to find by the name. In addition, you can also customize the name of the emulator according to your habits. For instance, you can name the emulator according to the game name.
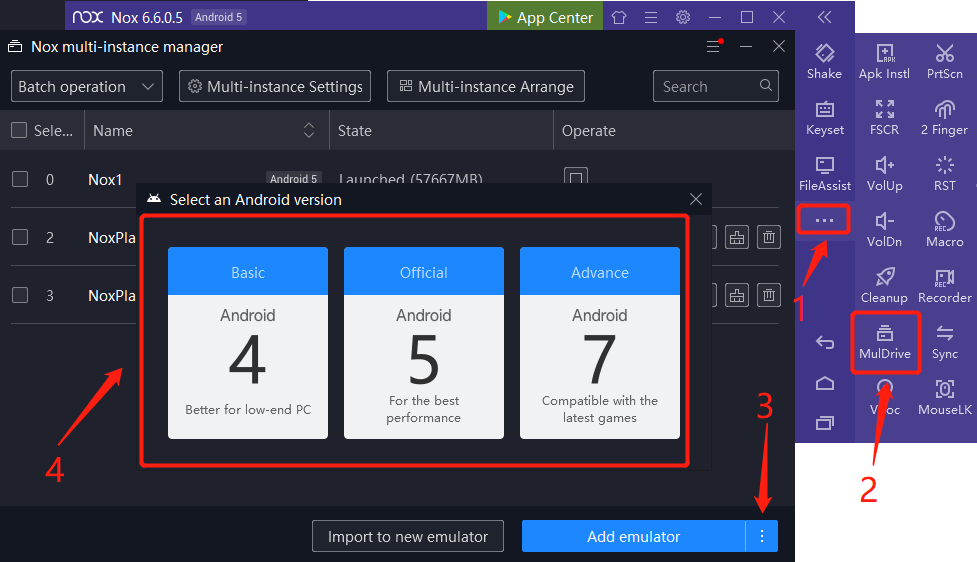
5. Add a new emulator
- Click Mul-drive on the toolbar
- Click
 to choose the Andriod version or directly click 【Add emulator】
 - Run the new emulator
Note: when you directly add an emulator, the Andriod version of the new emulator will be in accordance with your original emulator by default.
Here is a guide to add different Andriod versions: Click here
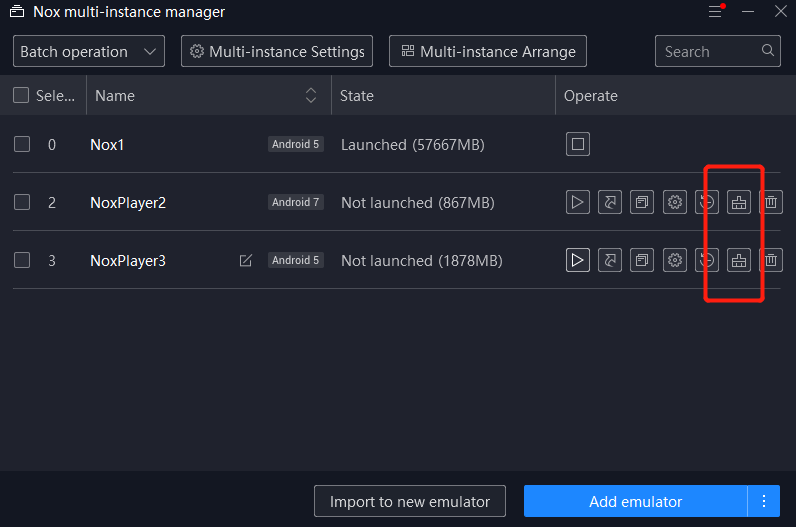
6. Back up/Import your data
Here is a guide: Click here
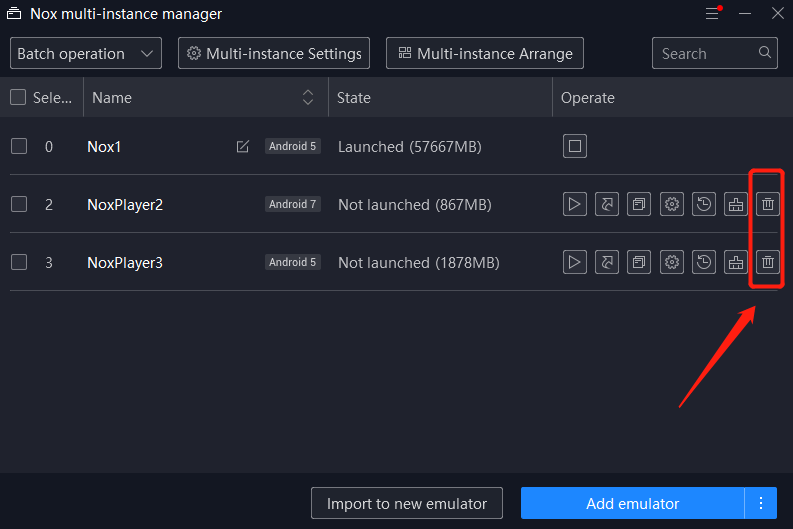
7. Delete
Click on this button and you can delete the instance and all your data. Please remember, your own data must be backed up. Back up/import button will help you to save all applications and games locally).
8. Clean up disk space
When your available memory is not enough, you can choose to clean up disk space.
Note: If you’re using a guest account to log in the game, please make sure that back up/import the data before you clean up disk space. Or else, all data will be not restored.
Here is the guide: Click here